Thursday, 23 May 2019

Perfection is overrated


Hi everyone.
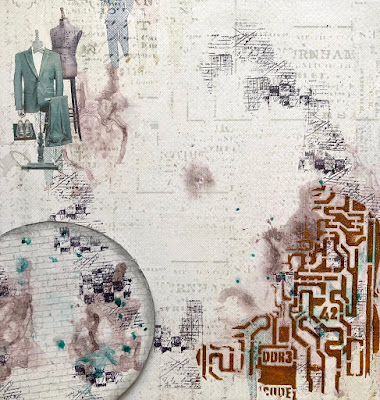
This is a layout which I created using the FabScraps "Men Only" collection 
and have included a short tutorial of how it was put together.

For this single layout, I used some of the papers from the range as well as two of the beer board circles from the album in the "Free Spirit" collection.


Cut one of the circles a bit smaller than the other and cover both in your paper of choice.


Stencil onto the larger of the two circles with paste.


After positioning the circles onto the paper, stencil onto the paper as well.
Do not glue the circles down yet!


Add some stamping onto the paper around the area where the circles will be placed as well as onto the smaller circle.


Add some inking with inks of your choice as desired.


Start assembling your layout, raising the circles on your page as well as raising the photograph.


Add some stickers from the collection.


Paint some wooden circles with rust paste.


Your layout is now complete!
I hope you enjoyed this tutorial.
Until next time!
💜


Thursday, 9 May 2019

Thoughts and theories


Hi everyone.
For this single layout, I combined two pages together 
by tearing one in half and gluing it to the bottom of the other.

I then covered the paper with clear gesso to prepare it for the water and inks which I wanted to add.

I positioned my photograph where I wanted it to be so that I could see where to add the inks and embossing around it.

I then added a combination of first "Fossilized Amber" and then "Fired Brick" Distress Oxide to the page, adding one colour at a time, spraying it with water so that it would "move" on the page and then drying it completely before adding the next colour.


I then ran some embossing paste through a stencil on top of the dried Distress Oxides, around my photograph area.

When the paste was still wet, I added some Wow! "White Puff" embossing powder on top of it and then heat set it with a heat gun until it was dry, puffing up to give texture to my page.


The Dusty Attic chipboards were painted with Prima Marketing Finnabair ArtAlchemy "Gold Coin" acrylic paint.


Some extra embellishments and flowers were added and the layout was complete.


I hope that this layout has inspired you.
Until next time!
💛


Wednesday, 1 May 2019

Upcoming mini album class


Hi everyone.

Today I am sharing a mini album called "Our Story" using the beautiful Mintay "Bloomville" papers,
a class which I am teaching next weekend.

Will share more after the class has taken place.


Please follow my Facebook page to keep up to date with upcoming classes and kits.

Have a great day!
💙