Thursday, 26 November 2020

Christmas Globe


Hi everyone.
I am sharing a Christmas Globe for the 13arts Christmas inspiration post up on the blog today.

I created this project with a perspex globe by first covering a wooden canvas with 
white gesso and then applying a combination bronze shiny powder mixed with 
gel medium as well as modeling paste and applying it to the canvas with a spatula, drying 
between each application.
I also added pastel mint mist to the background.


The bottom part of the globe was coloured with copper alcohol ink.


I adhered some of the 13arts Dreamland papers behind the globe and adhered it 
to the canvas, together with wire, leaves, glitter, stars and snow, before giving it all
a light dusting of white gesso.


Color Glow was added to the stars and then lightly painted with some of the 
bronze shiny powder and then, once dry, white gesso was added.


I added some stenciled leaves to the sides of the canvas with shiny powder 
mixed with gel medium.


I hope that this project has inspired you to create your own.
Until next time!
🦌


Every Summer has a Story


Hi everyone.
I am sharing a fun, Summer layout with you all today as Brand Ambassador for 
Penelope Dee using the bright and cheerful Summer Lovin' collection.


I created this layout by tearing some of the papers and adhering them 
across the centre of the page.
The chipboard embellishments were heat embossed in white and then some 
were rubbed with a copper wax.


Some stenciling was done with crackle mousse, leaving the mousse to dry naturally to 
bring out the best cracks.


A simple but happy layout.

Until next time!
💗


Monday, 23 November 2020

Magical Christmas


Hi everyone.
It's beginning to look a lot like Christmas.  Shops are already displaying their decorations, 
many have already put up their Christmas trees and in just a few short weeks, 
we'll be sitting down to a Christmas lunch which always seems to make our clothes 
just a little bit tighter 😉

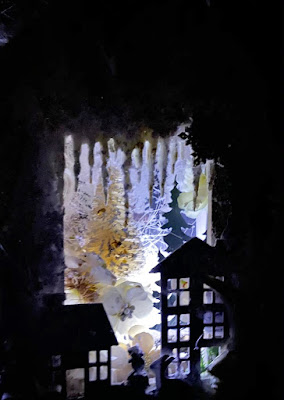
I am sharing this new project with you all which was created for 13arts' Christmas.

I used little wooden houses as well as some extra houses cut out on my Cameo Silhouette 
to create a 3D effect.

I prepared the wooden houses by first painting them with white gesso and then added 
snowflakes by adding stenciling with modeling paste.
Once the modeling paste was dry I combined gel medium (separately) with gold shiny powder 
as well as pearl shiny powder, together with very fine glass beads 
and, using a spatula, applied these two mixtures randomly onto the houses,
making sure to dry between each colour.

I also diluted a bit of both of these shiny powders and painted them (also separately and 
making sure to dry between each colour) 
onto the houses, spraying them with water to make the colour run between the beads.

Once the gel medium was dry, I applied gold and silver glitter paint with a spatula onto 
the houses, over the gel medium, until I was happy with the effect.

Once all mediums were dry, I added modeling paste with a spatula onto the houses 
here and there to give the effect of snow.
Someone gave me a little packet of "snow" years ago which came in very handy on this project.
It is almost like very fine plastic shavings and, together with the modeling paste, 
was perfect to create the effect of a heavy snowfall.


I cut some paper from the Dreamland collection and adhered it into the wooden box, which 
would hold the houses, and covered it with clear gesso before applying silver glitter paint 
onto it with a spatula as well as stenciling some of the snowflakes.


I used a cut file on my Cameo Silhouette to cut out a row of houses which I used on 
both of the wooden houses to give a 3D effect.
I also applied modeling paste with a spatula onto these little houses and then sprinkled 
the snow into the paste while it was still wet.
I love how real it looks!


I added other embellishments to make this project look 
like a winter wonderland and, once everything was complete,
I add a light dusting of fine glitter to give the project some extra sparkle.


And then, to finish it all off (with something that I added in the very beginning),
came the moment that I could switch the lights on and really turn it into a cold, dark, 
snowy winter's night.


Looking at it almost makes you feel chilly and reach 
for your imaginary hot chocolate! ❅❄❆☃

I hope that this project has inspired you to create something wintery of your own.
Until next time!


It's the most wonderful time of the year


Hi everyone.
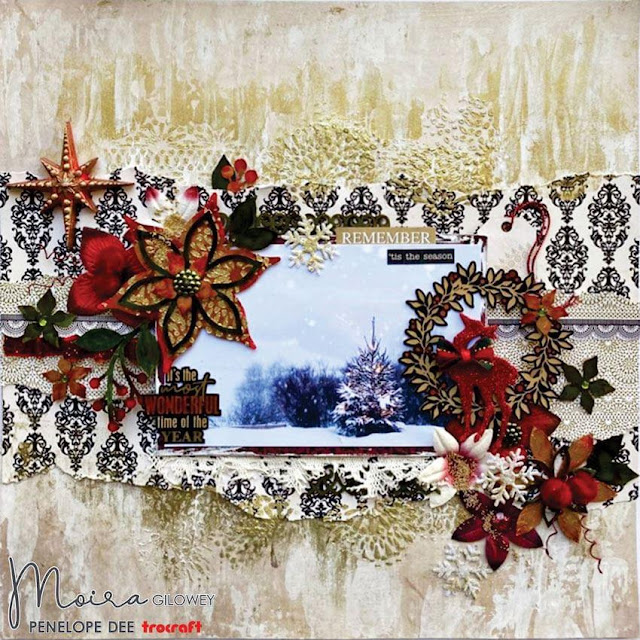
I am sharing a single layout as Brand Ambassador for Penelope Dee using the beautiful Merlot collection.

I love how versatile this collection is, whether for Christmas projects or for any other photographs (see my previous double page layout using the same collection).

I prepared the background of this layout by applying gold glacier paste using a spatula in a downward and upward motion from the centre of the page.


I then started building my composition up by tearing and adhering some of the 
paper from this collection onto the centre of the main page.
I then used the same glacier paste to stencil onto the page over the 
edges of the torn paper.


I coloured the chipboard poinsettia flowers with green and red alcohol inks and then, 
using blending solution, I added gold mixative for a Christmas feel.
Once the alcohol inks were dry, I stenciled onto the chipboard flowing using 
glacier paste, letting it dry completely before adding the layers.


I hope that this layout has inspired you to create your own.
Until next time!
🎄


Sunday, 22 November 2020

End of Summer


Hi everyone.
Today I am sharing a layout with you using the beautiful new End of Summer collection.
Who doesn’t love what Summer brings … the smell of the ocean, fun on the beach, ice-cream and 
spending time with friends … and I felt that this photograph shows exactly how Summer feels.


I prepared the background of the layout by stamping around the edges of the paper and then 
stenciling here and there for texture.  When the modeling paste was dry, I applied white gesso, 
then Golden Calcite Color Glow mixed with gel medium and then black ink with gel medium 
around the edges of my layout with a spatula, drying completely between each layer.


I also added some flower stenciling around the area where my main composition would be 
and then, when the modeling paste was still wet, I added copper glitter to the top of the paste 
and set it aside to dry completely.


Once I had added my photo and embellishments, I added amber and green colour 
around the composition.


I hope that this has inspired you to create your own project with the amazing 
13arts papers and products.
Visit the 13arts blog for a full list of products used.
https://13artspl.blogspot.com/2020/11/end-of-summer-layout-by-moira-gilowey.html

Until next time!
💛

Wednesday, 11 November 2020

Celebrate the little things in life


Hi everyone.
Today I am sharing a double page layout which I created as Brand Ambassador for Penelope Dee using the beautiful new Merlot collection.

I love that this collection is more than just Christmas paper ... it's for family and loved ones, gathering together to celebrate the simple things in life.

I altered the chipboard elements on this layout by colouring them with forest/moss green ink and then highlighting the details with gold ink.
The smaller elements were coloured with green distress crayon by rubbing the crayon into the grooves and then colouring the rest of the elements with gold ink.


I made a doily out of a resin and a mould and then, once set, I coloured it with pink ink and then highlighted the details with green and gold ink.
Stenciling was added with glacier paste to the opposite corners of the layout.


Splashes of gold completed the layout.


I hope that you like this layout.
Until next time!
💗


Monday, 2 November 2020

Dreaming


Hi everyone.
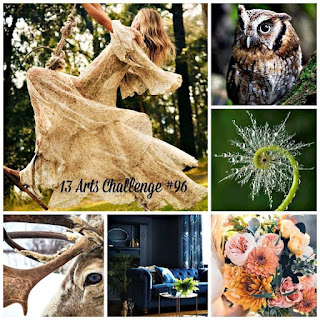
Today I am sharing a layout with you today for the 13arts November Mood Board Challenge.

Visit the 13arts blog on http://13artspl.blogspot.com/2020/11/wyzwanie-challenge-96.html
to view all projects by the 13arts Design Team for this challenge.


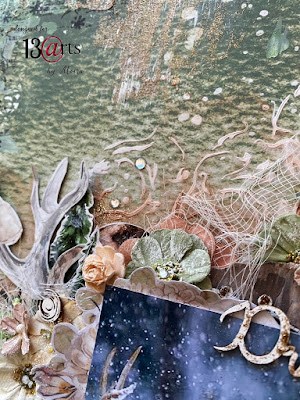
I used papers and embellishments from the the Dreamland collection for this layout.
I combined gesso and green ink together and applied it to the background of the layout with a spatula.


When the gesso was dry, I added Old Gold Glitter Ink over the gesso in places, 
dragging the spatula downwards on the page. 


Lots of fussy cutting and flowers were added around the main composition.


Stamping was added around the edges and Cinnamon ink added around the 
main composition for depth.


I hope that you like this layout and are inspired to take part in this month's challenge.
Until next time!
💚